Need a cheaper way to reduce the noise transmitted through the floor when you play your eDrums? I have used these DIY Noise Eaters since February 2020, and it has reduced the noise of my drumming significantly, much to the pleasure of my neighbours and my other half! Read on for the full guide on how to build your own DIY Roland Noise Eaters for a fraction of the cost and with minimal DIY skills needed.
How to make your eDrums quieter
As you already know, eDrums are substantially quieter than acoustic drums. This is because the airborne noise is greatly reduced – The decibels of sound generated from striking an electronic drum is much lower, thanks to the use of rubber or mesh.
However, the main reason why your neighbours might still hear you drumming is because of impact noise, which is generated by the physical impact against a solid material, such as your bass beater hitting the bass drum head – even if it is a mesh head.
These impact vibrations are transmitted through your bass drum and hi-hat pedals into the floor. That means if you’re an apartment drummer, don’t live in a detached house, or have a neighbour on the lower floor, they are likely to hear constant thudding sounds transmitted through the floor as you drum.
The biggest thing you can do to make your eDrums quieter is to reduce impact noise, which you can do if you build your own DIY Roland Noise Eaters using this guide.
What you’ll need
- 6mm thick MDF Board
- 12mm deep screws
- Rubber anti-vibration mat (I used 10mm, 60x60cm)
- Black PVC tape
- 2 packs of sylomer vibration damper pads (This is the crucial part that makes it all work)
Tools
- Hacksaw or jigsaw
- Pencil
- Ruler
- Large scissors
- Drill with drill-bit
Advertising Disclosure: Purchasing via the affiliate links above will net eDrumHub a small amount of commission, which helps pay our fixed costs such as web hosting, and adds no extra cost to you.
Using sylomer pads to reduce the volume of your eDrums
The secret ingredient to these DIY Noise Eaters is the use of sylomer pads – in this case, Polysound Sylo Puck pads, which are originally designed for isolating speakers from their mounts in professional audio settings.

These pads are designed to work within specific pressure/weight ranges. When the weight of the vibrating item above the pads is within the right range, those frequencies are cancelled out.
Update: The original product I bought is available here but is currently out of stock. I have updated the guide with this product which is the same but with a different brand name.
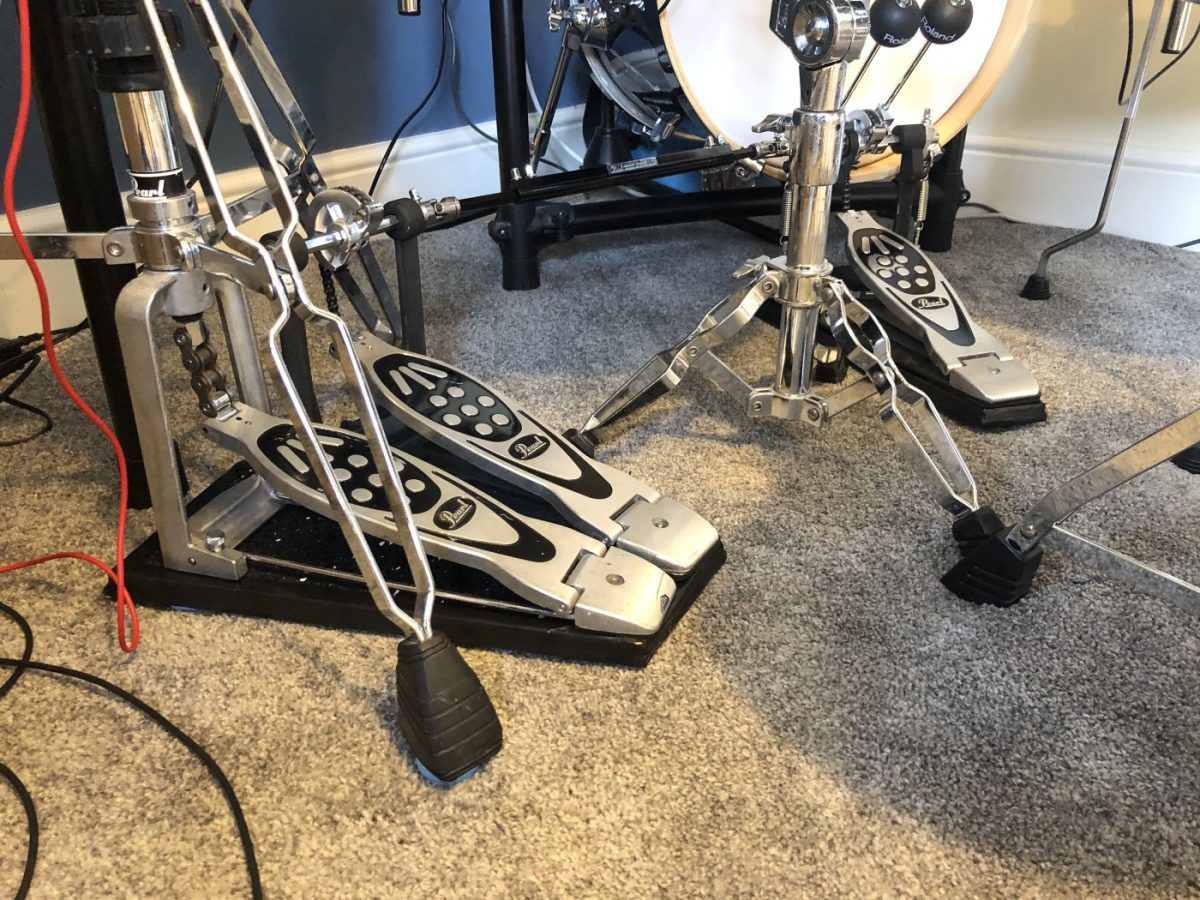
Step 1: Weigh your bass drum and hi-hat
As we’ve seen, sylomer pads work within a certain weight range, so you need to know the weight of each item you want to isolate from the floor.
Take your Hi-hat stand with hi-hat pad attached, plus anything else you might want to mount off the hi-hat stand, such as a stick basket or cup holder, if you use one. Weigh this, and then do the same for your bass drum pad with pedal.
If you use a double bass pedal like me, weigh your slave/secondary pedal along with your Hi-hat stand, since you’ll need that pedal to be mounted together with it.
Related: Our pick of the best double pedals for electronic drums
Now, refer back to the weight ranges of the sylomer pads product listing, substituting ‘speakers’ for the two items you’ve just weighted. These are:
- Yellow for speakers from 2-6 kg
- Orange for speakers from 5 to 10 kg
- Blue for speakers from 7-15 kg
- Pink for speakers from 11-22 kg
- Green for speakers from 15-30 kg
- Brown for speakers from 23 to 60 kg
While it’s not clear from the Amazon listing how many pads are used for each speaker, one would assume it’s four for stability. Some mathematics are needed, as you’ll need to try and balance the number of pads for stability vs the weight range you are trying to meet.
For a Hi-hat stand, you might need to use:
- 3 pucks for the hi-hat legs
- 2-3 pucks for the footplate
- 1-2 additional pucks for the second bass pedal, if you use one
For the bass drum, you might need:
- 2 pucks for the bass spurs, if your electronic bass Drum has them, or 2-3 for the kick tower
- 2-3 pucks for the bass pedal
Remember, you’ll need to factor in the weight of the MDF boards that you’ll be building as well, so it is best to get a set of sylomer pads rated for slightly less than the weight you need, as it’s easier to add more pads than taking them away, which might mean compromising on stability.
Step 2: Building the base plates
The next step is to build the base plates to mount your hi-hat and bass pedal to.
Take your MDF board and place your pedals on top of them, drawing around them with the pencil and ruler to mark out your boards. You may want to add around an inch of extra space in each direction to give extra flexibility in your set-up later, or if you’re pretty set in your ways with your set-up like me, you can try to hug the shape of the pedals very closely for a more minimalist approach, which also minimises weight.
When you’re happy with the shape, use a hacksaw or jigsaw to cut it out.
The next step is to attach the rubber anti-vibration mat. While the mat I used is designed to reduce vibrations from washing machines, the use here is actually to provide grip for your pedals when on their respective board.
You’ll need to trace the shape of your two hi-hat and bass drum MDF boards to your rubber mat, and cut around them with scissors, a saw, or a jigsaw.
Step 3: Putting your base plates together
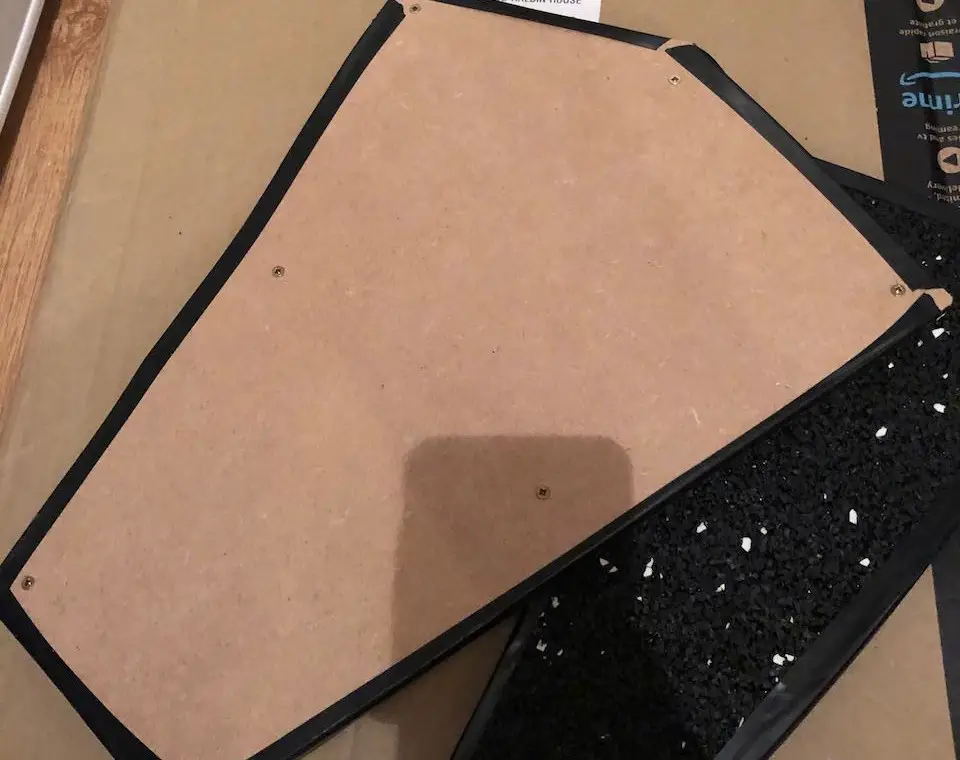
The final stage is to assemble the boards. I used screws to do this, making sure to use a length that was less than the total thickness of the MDF board and the rubber mat, so as not to have the tips of the screws coming out the top.
I used self-tapping screws, which drill their own hole into the MDF as they are bored in. Simply start by placing the rubber mat face down on some cardboard or other scrap item to protect the surface you’re on, putting the MDF board on top and lined up with where you want it, then screwing in.
Several screws near the corners of the base plates will keep your MDF and rubber parts held together.
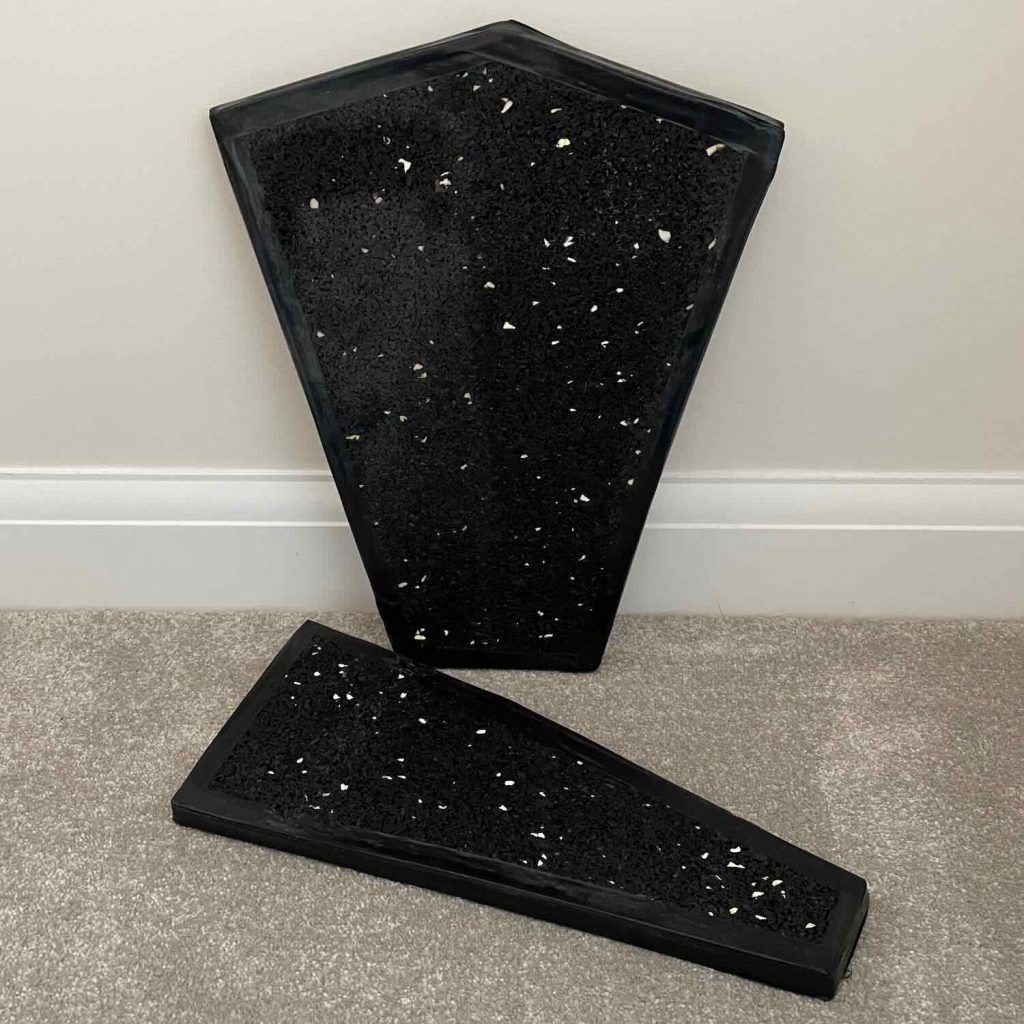
You can then use PVC tape to line the edges and provide a neat, all-black look to the sides of your base plates.
Here, we can see the finished articles from the front:
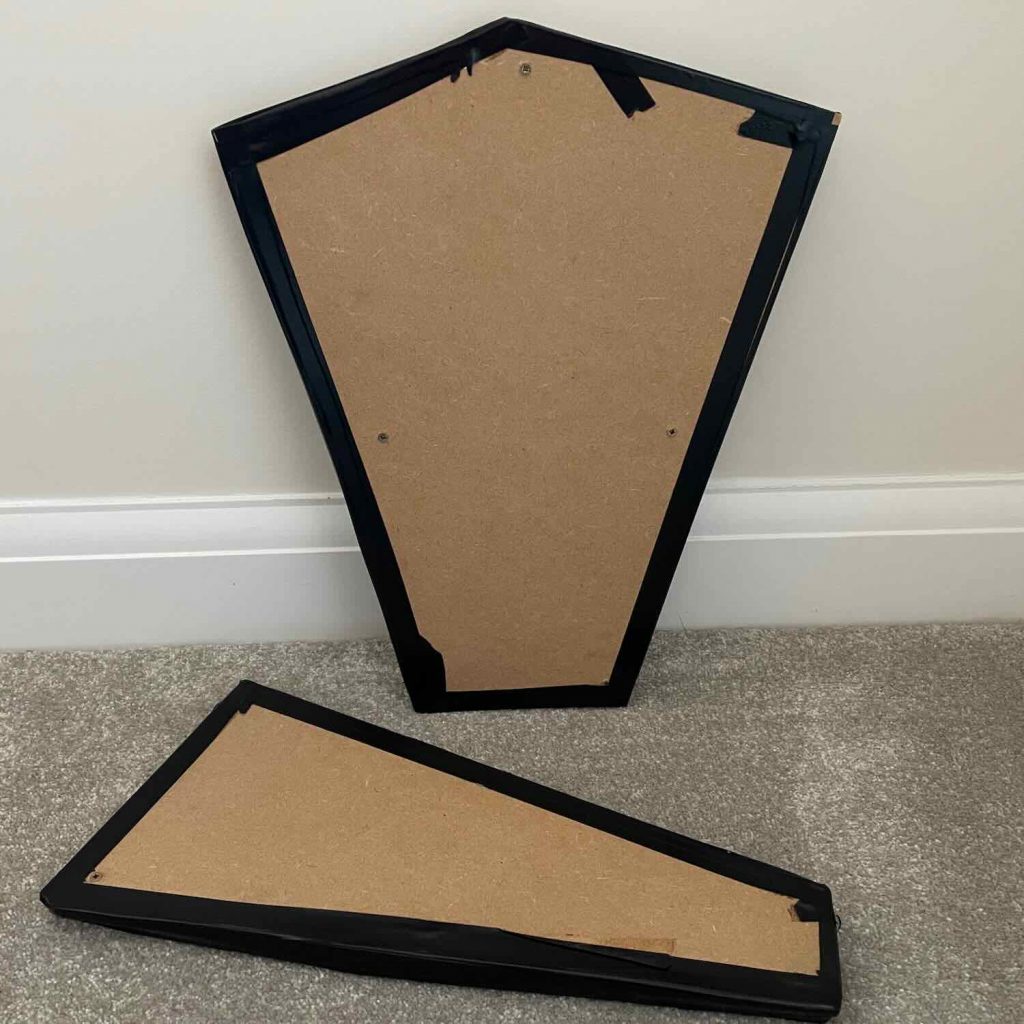
And the back:
Step 4: Set up
To set up, place your sylomer pads roughly around the perimeter of where your hi-hat and bass pedals would be, place the base plates on top, and then 2-3 sylomer pads for each of your hi-hat stand feet and bass drum spurs.
Place your Hi-hat and bass on top of the base plates, and then test!
Step 5: Testing your DIY Roland Noise Eaters
To test your new quiet eDrum set-up, you’ll need someone to help, ideally with access to the room below your drum room, so you can do a before-and-after comparison of using the DIY Noise Eaters.
If all is well, you should notice a dramatic decrease in the amount of impact noise transmitted to the floor below, perhaps an 80-70% reduction.
Troubleshooting
If the noise reduction is not as great as expected, then this is likely to be down to the weight and compression on the sylomer pads. You may need to experiment with the number of pads supporting each platform.
You can try the following steps to troubleshoot your set-up:
- Re-weigh both your hi-hat and bass drum with the base plates
- Add or remove sylomer pads under each base plate to try and get within the right weight/pressure band
- Ensure each point of contact of both the hi-hat stand and bass drum is isolated with a sylomer pad
- If each of your plates are over the weight, then consider cutting the sylomer pads to reduce their size and therefore concentrate the pressure on each pad
- Take turns going downstairs to listen to the before-and-after changes – as a musician, you might find you’re more attuned to volume and sound changes than your helper
Wrapping up
Roland Noise Eaters are very pricey, and this DIY approach can save you a significant amount. The steps above cost me £57 GBP, vs up to £365 for a full set of Roland Noise Eater mats and rack mounts. It has made a dramatic difference to having a harmonious relationship with the neighbours, while offering the peace of mind that when I’m practising the drums, I’m less of a burden to others around me!
This article contains affiliate links. If you purchase a product through certain links on our site, we may earn a small affiliate commission. Learn more about our adverts and why you can trust eDrumHub here.

What is the new Drumeo eKit Bundle?

How to Protect Your Hearing While Drumming

Is Drumming an Expensive Hobby?
9 replies on “Build Your Own DIY Roland Noise Eaters”
Hello, this article is very useful but I just wanted to add that I think the weight range point is undermined by the way you have built this, because you have not assessed the force of impact of playing. As you are trying to dampen the noise of the impact, not the kit sitting idle, you would also need to be able to assess the expected force of, for example, the user pushing down the kick drum pedal, and then convert it into the additional weight (via force) this would add.
If, hypothetically, the optimum weight range of the kit with everything on the noise eater is 29kg, and your sylopucks are fit for 30kg, and then you are a very loud/forceful player you are easily going to exert more than 1kg of downward force on the pedal. This means at the point of impact (when you want the sound reduction) you would not be in the optimal range of the sylopucks dampening ability.
Therefore, it makes more sense to buy more pucks than is needed not less, because 1. You can always take some away (and you can’t add more if you don’t own more) and 2. You can add more to account for the force of the kick pedal hit.
You can find papers online assessing expected force of a kick pedal hit and this is quite significant in the context of this, if you are trying to be accurate to maximise effectiveness of the pucks. Cheers
Thanks for your comment and information about factoring in the impact force! For me, when I built these DIY Noise Eaters they made a significant reduction to the noise in the room below. With my helper in the room below, we found there were diminishing returns adding additional sylomer pads, but you’re right, maybe this varies by playing style. The sylomer pucks have a fairly wide operating window in terms of weight, so my interpretation was that my playing was captured within that.
That said, I will review the wording about more/less sylomer pucks based on your feedback to ensure that makes sense. Thanks again for taking the time to share your expertise!
Very useful article. Definitely going to give this a go. The Roland NEs are way over-priced and the guy downstairs is getting annoyed…..
Thanks for your comment Grant! Good luck with your build 🙂
Thank you so much for your post, really helpful.
I’m in the same situation so I’m looking for solutions and the one from you seems to be really good.
I wonder if you could show some clear picture of the plate for bass drum and pedal
Hi Alfredo, thanks for your comment and glad to hear the article was useful. I’ve updated the photos with some clearer ones of the two plates. Hope this is what you were looking for!
Thanks a lot Seb,
I was curious about that because my bass drum has a metallic structure instead of legs with spurs (do a search with the terms “Millenium MPS-850 08″ Mesh Head Kick Pad” for a visual explanation) so I wanted to see clearly the shape and how long was your bass plate.
It seems that your bass drum have legs so I’m supposing you used sylomer pads for every leg spur as you did with the hihat legs (seen in the photos).
How do you attached the sylomer pads to the plate? Glue, I guess but I’d like to confirm…
Hi ALfredo, just to confirm with mine, the plate for the bass drum covers the area occupied by the bass drum pedal only – not the full bass drum (same as the official Roland Noise Eaters). I used individual sylomer pads on the two bass drum legs so the entire bass drum is supported on sylomer pads.
With mine, the plates just sit on the sylomer pads – they are not glued on or attached in any way. The weight is enough to avoid the bass drum sliding around. But your bass trigger may be lighter, so glue might be the answer if it moves about.
I’ve had a look at your bass kick pad, if I was building it I think I would make a much larger plate that covers the area of the bass pedal AND the kick trigger itself. This might provide more stability than trying to do it in two pieces.
lastly, you could even try placing the pedal and trigger directly on the sylomer pads with no base plate and see if that works. It might help you work out where the stability is needed from a more robust base plate to mount everything on.
Hope that’s helpful! Best of luck with the build
Thank you so much.
You’ve been very helpful and kind.
Keep up the good work.