Drum covers are very popular, with thousands uploaded to YouTube, Instagram and TikTok daily. But they’re not just a way to share your performances with the world, they’re also a helpful way to document your progress, which can be a great motivator to encourage you to keep learning the drums. Whether you’re new to recording drum covers or looking for a more streamlined workflow for filming and uploading, we’ll look at how to record drum covers with electronic drums, which is quicker and easier than with acoustic drums with a handful of tools.
How do you record electronic drum covers?
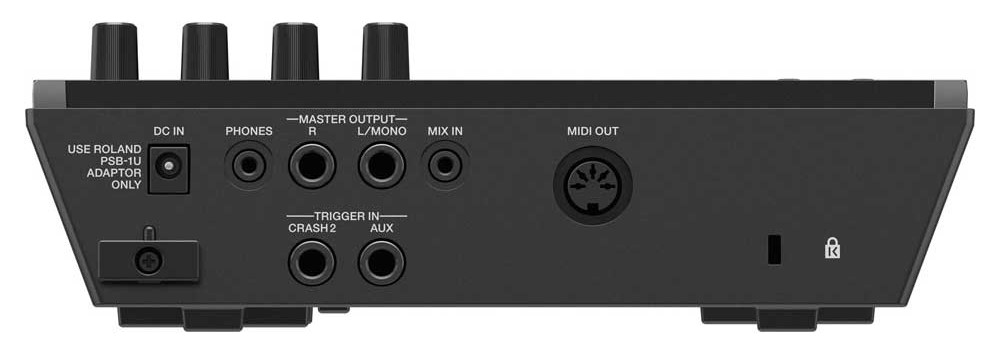
Electronic drums are simple to record thanks to the master audio out found on most drum modules. The simplest way to record your drums is to connect this audio-out directly to any camera with a mic-in or line-in port, and press record.
To make it a drum cover, you need to play along to your backing track. This is simple too, as you can connect your phone or audio device to the mix-in port on your module, or use Bluetooth if your module has it. The majority of modules will mix that audio in the master out (for example my TD-11 does this), whereas some higher-end modules can have options to turn this on or off in the menu.
Some drum modules such as the Roland TD-17 feature Bluetooth too, but this is only for your backing track – you can’t stream your drum cover directly via Bluetooth. Learn more at our guide to Bluetooth on eDrums.
Steps for recording a drum cover with eDrums without a computer
- Plug your headphones into the headphone port on your module
- Plug your camera’s mic-in into the master-out on your drum module using a dual 6/35mm to stereo 3.5mm cable. You can get these from Amazon
- Plug your audio device with your backing track into the mix-in port on your module and set the right volume level
- Check the volume levels are correct in your headphones and on the camera (using a mic volume meter or doing a test recording)
- Hit record on the camera, then play the song via the audio device. Record your drum cover, then stop recording!
Can you record drum covers when using a VST drum library?
If like me, you prefer to use a drum library like Superior Drummer 3 with your eDrums instead of the module’s onboard sounds, don’t worry – you can still record drum covers using the method above if your module has a USB interface.
The way this works is by connecting your module to your PC via USB, and setting the module as the audio device for both your computer and drum software (whether stand-alone or through a DAW like Reaper).
Next, ensure your module’s sounds are turned off. To turn off the onboard sounds on a Roland module, navigate to the settings menu and turn off “local control”.
You’ll now hear your VST drum library’s sounds through your module’s headphone mix, along with all computer audio. This is then duplicated via the module’s master out.
A word of warning – all computer audio will be routed to the module and into your camera, so ensure there are no other apps open on your computer that could generate sounds and ruin your recording!
Steps for recording a drum cover using a VST drum library
- Plug your headphones into the headphone port on your module
- Plug your camera’s mic-in into the master-out on your drum module using a dual 6/35mm to stereo 3.5mm cable. If you need one you can grab one from Amazon
- Plug your drum module into your computer via USB
- Open your drum library, either in its standalone application if it has one, or as a plugin inside a DAW such as Reaper or GarageBand
- Ensure your drum module is set as the audio out device and MIDI in device
- Open your music player on your computer, such as Spotify or Apple Music.
- Test that the music and drum sounds can be heard at the correct volume via your headphones and camera by doing a test recording
- Record your drum cover!
What if my camera doesn’t have an audio-in port?
Things get a bit more complicated if your camera doesn’t have an audio-in or mic-in port. This leaves you with two options:
- Record the audio and video separately, then match them up in an app like iMovie, GarageBand, or OpenShoot, using the guide below
- Browse our list of recommended cameras with audio-in below
How to match up audio and video for your drum covers
If you don’t have the ability to record your drums and backing track directly using your camera, you’ll need to match up the audio and video afterwards. This can be done with any video editing software that features an audio/video timeline, allowing you to drop in your audio and video files, synchronise them on the timeline, and export a new video file where the camera audio is replaced by the audio from your drums and backing track.
Below are a few methods for doing this:
Using Garageband on a Mac
If you own a Mac, you’re in luck – Garageband has a great feature which allows you to sync audio to video.
To record, follow these steps:
- Plug your drum module into your Mac using the USB interface if it has one. If not, you need to use an external USB audio interface
- Open Garageband, go to the Garageband menu and click on preferences, then select your drum module as the input and output device
- In the main Garageband window, drag and drop the audio file for the song you’re covering so it loads in as a new track. Move it to the right slightly on the timeline, so you have a bit of time before the track starts after pressing play.
- Add a second new audio track with your drums set as the instrument. If you are using a VST drum library like Superior Drummer, then choose a midi track instead, and load the VST instrument as the plugin, checking that your drums trigger the sounds correctly before you start recording
- Hit record in Garageband and on your camera. This does not need to be at the same time
- Strike your snare pad hard, or any other pad that can be identified easily by both Garageband and your camera. This is crucial for getting the audio and video in sync later on. Be sure to do this before the song starts!
- The backing track should now kick in based on where you placed it on the Garageband timeline in step 3. Continue to play along to the song until it’s finished!
- End the recording when the song is over both in Garageband and on the camera
The next step is to sync your video and audio takes. First, download your footage to your computer, and drag and drop it into Garageband. You should see it appear in the timeline at the top, with a new audio track for the camera audio, like this:
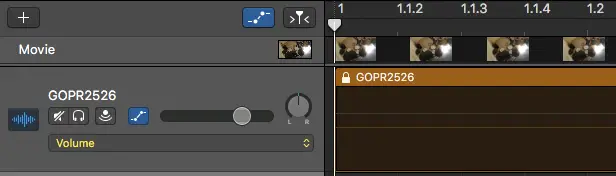
Next. scroll through both the camera audio to find the snare hit or loud nose at the start of the track from step 6. Keeping the drum audio and backing track aligned, line this up exactly with the same sound on the camera audio. Then, mute the camera audio channel and press play. The video and audio should be in line.
You can then edit out the snare hit or leave it in and crop the length of the video after exporting.
To export the video, go to File, Movie, and select Export Audio to Movie. In the next menu, choose full quality. The video file will then have the camera audio track replaced by your new drum track, which you can then Airdrop to your phone, crop, and post to your favourite social network!
Using Audacity and OpenShot on a PC
The steps for recording your drum cover on a PC are the same, only with one additional step. Instead of recording and editing the video in one place, you’ll need to split this task into two.
Fortunately though, recording your drum cover will not cost anything extra, as Audacity and OpenShot are both open-source, and therefore free to use.
To record your drum cover you’ll need to:
- Connect your eDrums via USB, open Audacity, and set up your drum module as the audio playback and recording device
- Drag and drop your mp3 backing track into Audacity
- Click record in Audacity and on your camera.
- Strike your snare pad hard, or any other pad that can be identified easily by both Audacity and your camera as before
- The backing track should now kick in based on where you placed it on the Audacity timeline in step 3.
- When you’re happy with your take, in Audacity go to File then Export, and Export as MP3
The next step is to align the audio and video from your camera in Openshot. Simply import your audio and video files, add both to the timeline, and align the noise you made at the start to sync the audio and video. Delete the camera audio so you’re left with the camera video and Audacity audio recording. You can then export your video for sharing!
Best cameras with audio input
If you don’t yet have a camera with an audio input port, but like the idea of how they can dramatically simplify your drum cover recording workflow, here are a few cameras we can recommend.
Best wide-angle camera for drum covers
Most wide-angle cameras on the market are action cameras such as GoPro, but unfortunately, they don’t typically come with an audio input port. If you need a wide-angle camera with an audio input, then the best product I could find is the Zoom Q2N-4K, a camera designed specifically for musicians.
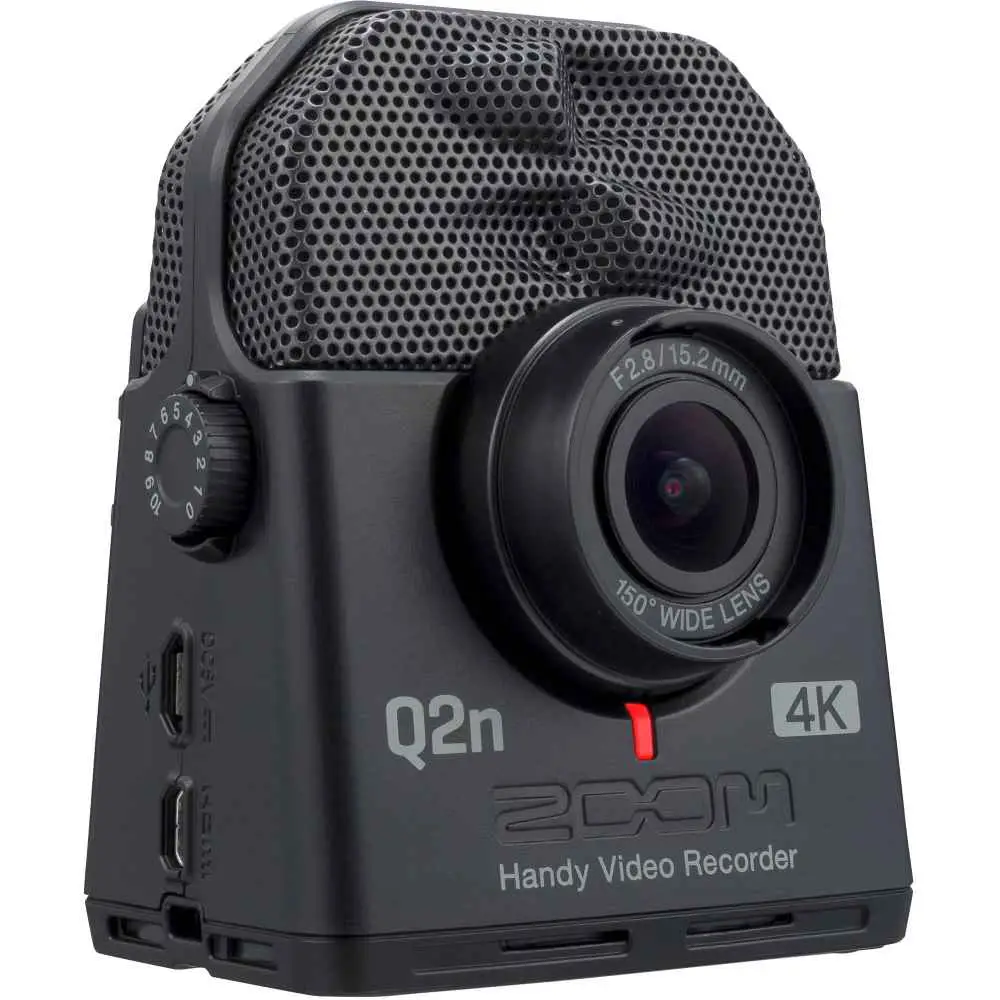
Not only does the camera include a 3.5mm stereo line-in port and a 4K wide-angle lens, but it also has a high-quality stereo microphone. You won’t need this for recording your eDrums, but if you play acoustic too, this is a great camera to record all your performances.
The camera includes an input volume control dial that controls either the gain on the microphone or the audio input via the 3.5mm socket, with a handy volume meter on the screen to get the level just right.
I’ve used this camera for several years now without issue and can highly recommend it for drummers. While it might not have advanced features like Bluetooth, this is reflected in the low price, coming in at around $189 or £179.
You can pick up the Zoom Q2N-4K on Amazon.com and Amazon.co.uk, or grab it with a free 32GB memory card from Guitar Center.
Best mirrorless camera for drum covers
For drummers who want better image quality or also want to use their drum cover camera for holiday snaps or general photography, a mirrorless camera might be a good choice. A mirrorless camera is comparable to a DSLR when it comes to image quality and the ability to swap lenses but is much smaller in size. This is because a mirror is not used in the mechanism, hence “mirrorless”.
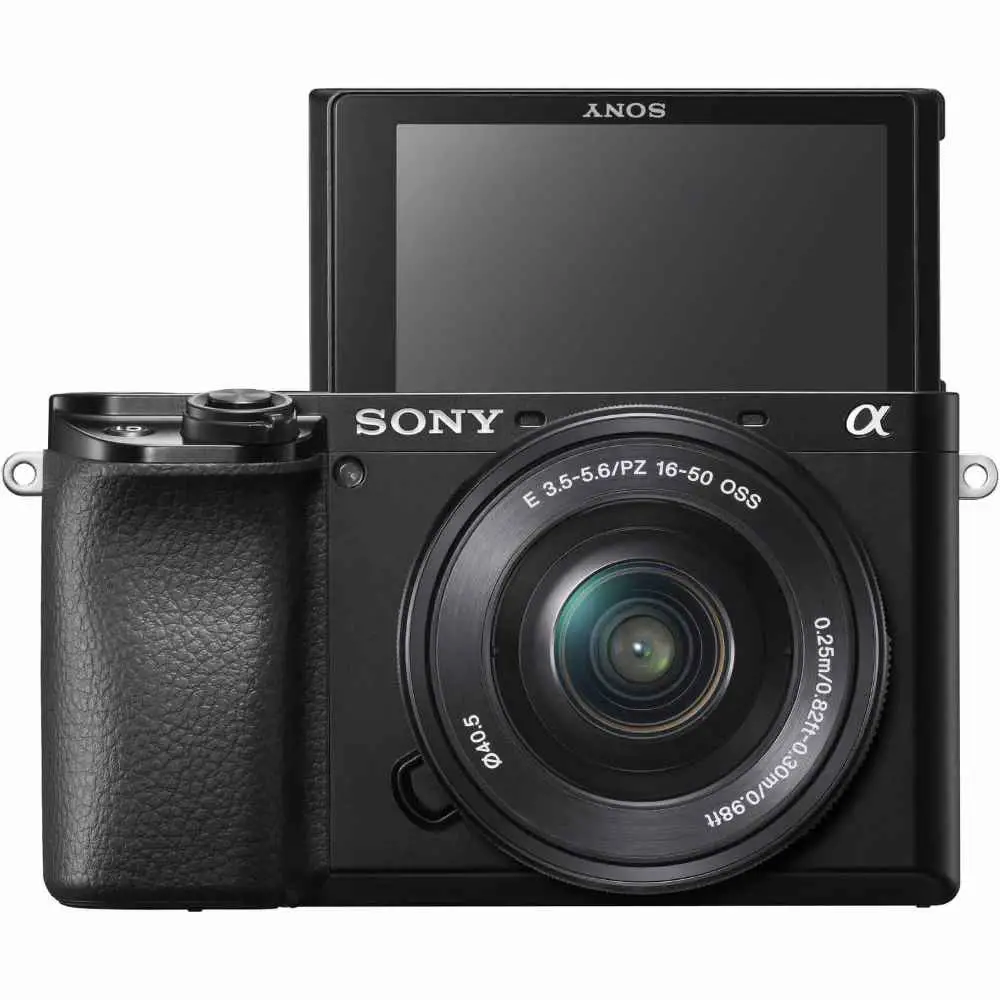
The Sony Alpha 6100 is a popular choice and comes in at around $850 or £700. Like the Zoom Q2N-4K, this camera has a 3.5mm stereo mic input, but also adds wifi for transferring images and videos to your phone or computer.
On top of that, the A6100 features a flip-up screen for vlogging, or in our case, allowing you to monitor the video footage as you play. This is great to help you set up your camera before you record your cover, as you’ll be able to ensure you’re in the frame while sitting down at your kit.
The Sony A6100 is available at Amazon.com or Amazon.co.uk.
Improve the visual quality of your drum covers with good lighting
Whatever camera you choose, good lighting is essential for the best video quality. Cameras rely on lighting to capture a quality image, and if your room is too dimly lit, your video will appear grainy in darker areas.
Specifically, you need lots of diffused light, which is a soft light that doesn’t cast harsh shadows. You can achieve this by ensuring lamps in your room have shades, or by buying specific soft lighting for video recording. Here are some options from Amazon.com and Amazon.co.uk.
This article contains affiliate links. If you purchase a product through certain links on our site, we may earn a small affiliate commission. Learn more about our adverts and why you can trust eDrumHub here.
Does drumming count as a workout?
How to Soundproof your apartment for drums
How to learn the drums at home without a drum kit

3 replies on “How to Record Drum Covers with Electronic Drums”
Hi Seb, great article about doing drum covers with electronic drums! I have some questions regarding recording a drum cover using a VST library – in my case I am using EZ Drummer 3, Reaper (or I could use EZD3 as a standalone if necessary and/or warranted by any advice you might be able to give), Samsung Galaxy S21 phone and my TD-17 kit. I followed the steps as laid out in your steps for doing a drum cover using a VST drum library: I have a 3.5mm adapter from my phone since it’s USB-C, have a 3.5 mm TRS to Dual 3.5mm TSF Stereo Breakout Cable – with that cable running between the phone connection and dual TRS cables to both L and R master outs on the TD-17. I hit record in Reaper with the backing track, and I can hear my drums as I play them with the backing track, but don’t hear any sounds on playback of my phone video with the exception of room noise and hitting pads (I am using the default video recorder on my phone). I am, however, hearing the playback of the backing track and my drums in Reaper. Shouldn’t I be hearing playback of everything on my phone video since it’s tied into everything? Please help and thank you!!
Hi Steven, thanks for your comment! It sounds like the issue may be with your phone or the USB-C 3.5mm adaptor. To confirm you could try plugging your headphones into the L/mono master-out socket to ensure your master-out is definitely outputting the correct sounds.
I think the next thing to verify would be that your camera app definitely will automatically switch to using the USB-C input on the camera app. I’m not a Android user so unfortunately I can’t advise on this. Maybe there is an input setting somewhere in the app? Or try a different app with audio recording to confirm it’s not the app that’s the issue?
Alternatively, it may be that the adaptor or phone can only recognise a mic input if it’s built into a headset. So if you have a headset with mic, you could try testing this with the adaptor. Headsets will have 3 rings on the 3.5mm jack instead of 2, which may be why the mic input isn’t recognised using your stereo cable.
The other thing to consider is whether the USB-C-3.5mm adaptor is working, I have seen that these adaptors aren’t always reliable – e.g. in this video: https://www.youtube.com/watch?v=rznurHax_ZQ
If it’s new and you don’t have another way to test it, maybe you could return it and try one of the adaptors recommended in that video.
Hope this helps as a starting point, and good luck!
Got it working with the iRig 2 and the sound quality is actually great! After messing around with different connections I finally landed on a working one and the USB-C adapter works fine. My setup ended up being L mono to iRig 2, then iRig 2 into the adapter to phone. I knew the sound was being output as it was registering in Reaper, so after I tested the stock video recorder I took my headphones from the headphone jack in my module and plugged into the iRig 2 and the sound was there to include the backing track! I tried everything to keep form having to use the iRig 2 as I was worried about the sound quality being only mono – but it sounded just fine!! Thanks for your help!!! Look me up on YouTube, Michael Myers of Manatee County (MMOFMC)!!