Jobeky is an eDrum builder based in the UK, and one of the more well-known in the eDrum space, having been making acoustic-style eDrums for many years before the launch of the Roland V.A.D. series or even the ATV aDrums. Aside from building eDrums, Jobeky also sells a wide range of eDrum components, so you can convert your own acoustic drum to electronic without needing any soldering or electronics experience.
I’ve used Jobeky’s internal dual zone side triggers on my own eDrum build from way back in early 2017. Below, I’ll share my experience and how the triggers have held up over the last 6 years.
Jobeky Side Trigger: Review Summary

Summary
These Jobeky triggers have offered reliable performance for 6+ plus years. However, the buying experience is not as polished as a mainstream product. Expect a wait as your product is built, and shipped in random packaging.
Disclosure: I purchased 4 triggers with my own money. I have not been asked by Jobeky to write this review and have not received any payment to do so, and do not receive a commission from any Jobeky sales.
What is a Jobeky side trigger?
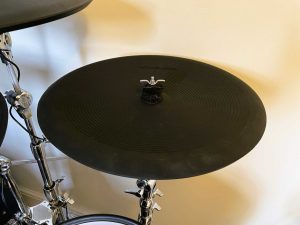
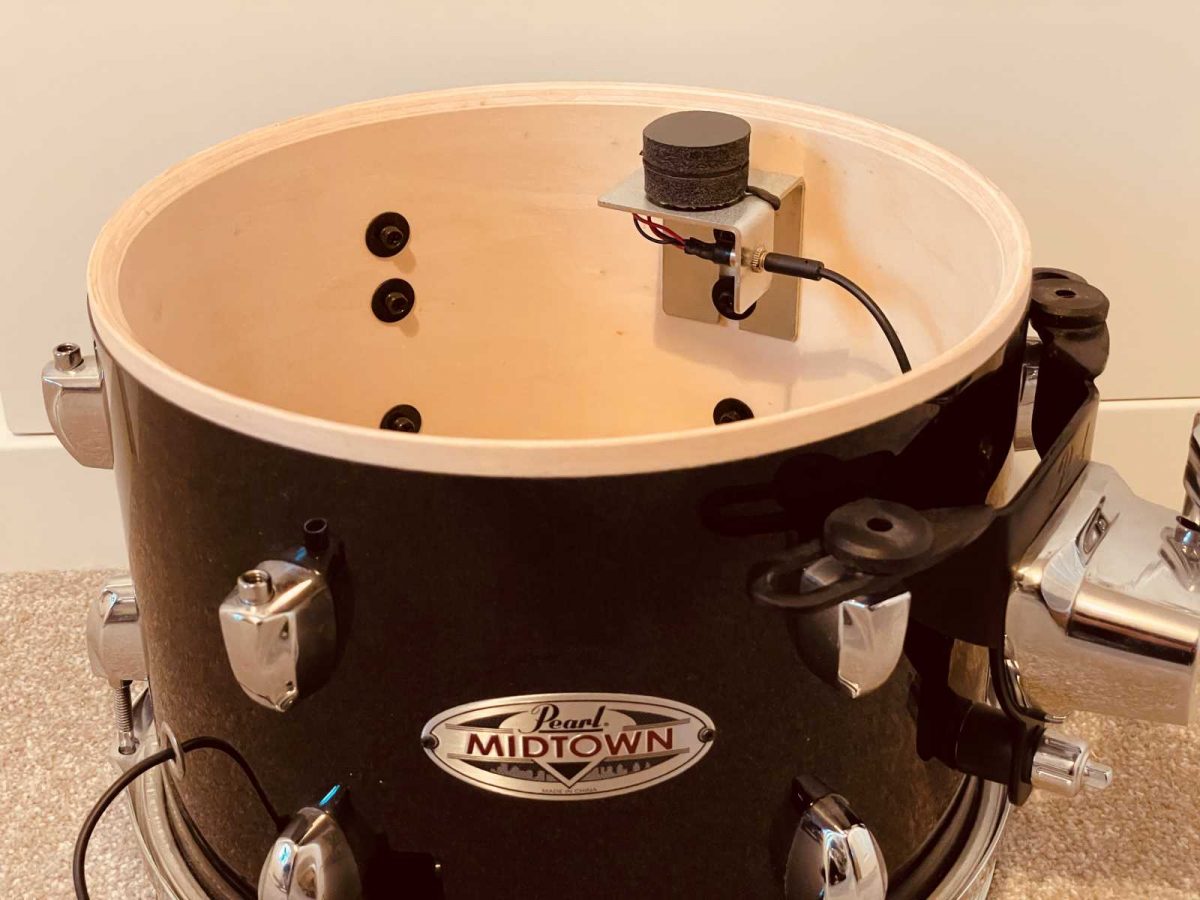
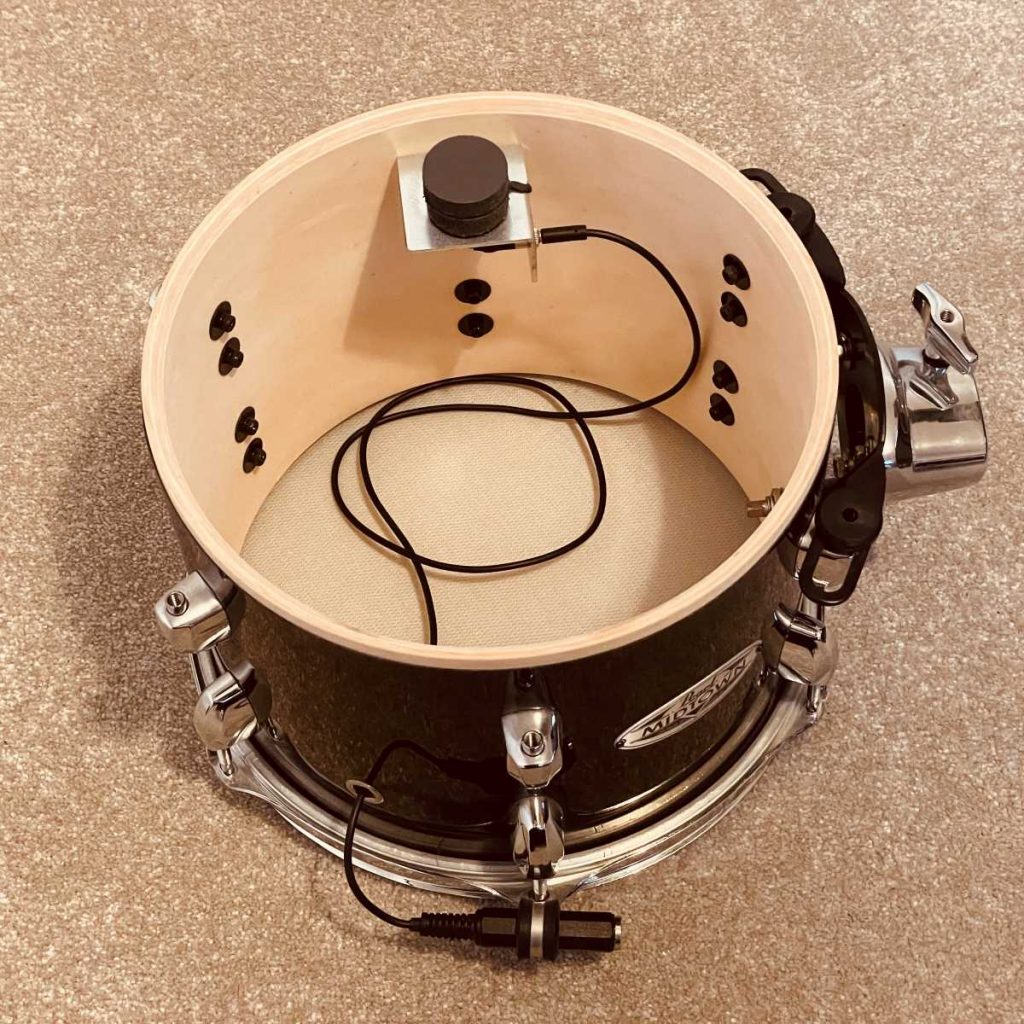
The Jobeky side trigger is an internal electronic drum trigger that mounts to the lug screws inside your drum. With a side trigger and a mesh drum head, you can turn your standard acoustic drum shell into an electronic drum. It’s designed to work with Roland, Alesis, and 2Box modules.
The Jobeky internal side trigger is dual zone, with a head and rim piezo sensor. This means it will trigger when you play the drum head or a rim click or cross-stick. Because the sensor is mounted on the edge of the drum head instead of the middle, the side trigger does not support positional sensing.
This is comparable to Roland’s lower-end range of mesh drum pads – those that come with the TD-07 or TD-17 drum kits. These modules do not support positional sensing, so the Jobeky side trigger is a good option if you want to convert an acoustic drum shell for use with either of these modules. They work in the same way as the pads that come with these kits, with the sensor located at the bottom edge of the head.
If you own a module that supports positional sensing such as the TD-27 or TD-50, or older models including the TD-15, TD-25 and TD-30, then you might want to consider Jobeky’s centre-mounted trigger systems instead. However, be aware of the common ‘hot-spotting’ issues with centre triggers, where the input can spike if you play directly on the sensor area.
Other components and accessories
In addition to the trigger itself, you’ll also need to choose a connector cable so you can connect your ¼ inch TRS jack to your pad, via the 3.5mm jack on the trigger unit. There are two types of connectors you can choose from: vent hole and external.
The vent hole cable is the neatest way to connect your drum, as it reuses the vent hole as the mount for the jack socket. You’ll need to ensure your drum’s vent hole is 12mm across for this to work, and you may need to remove the metal grommet in the hole. Alternatively, you can drill a hole in your shell, though this is not recommended if you might want to return the drum to stock in future.
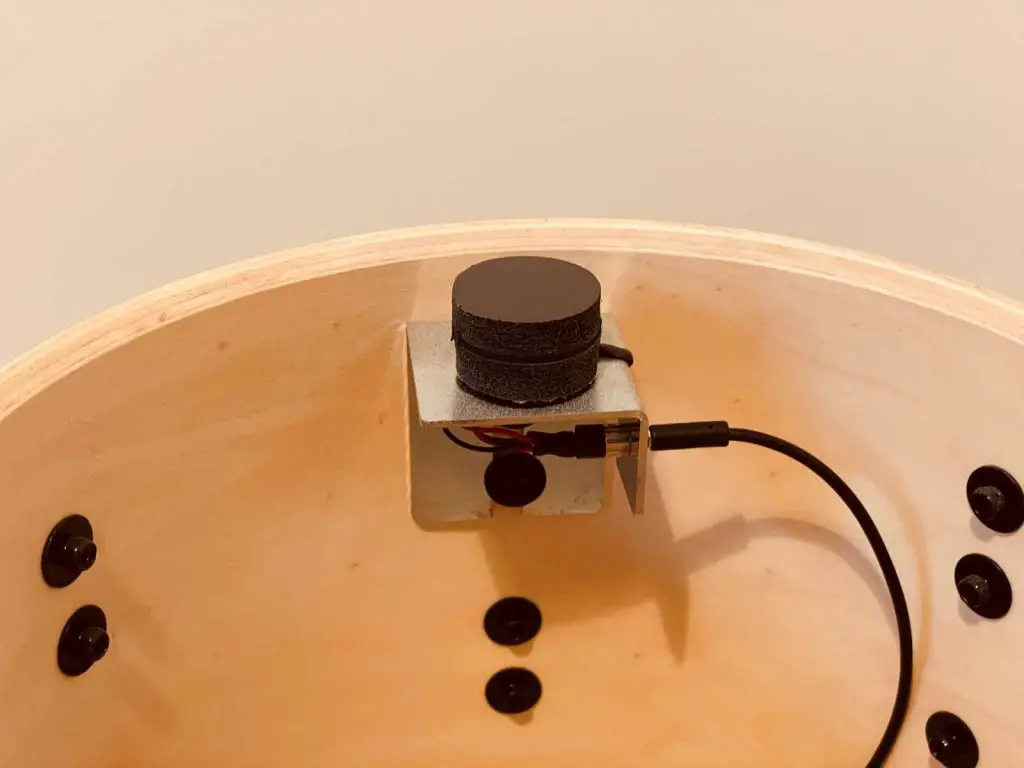
For me, I opted for the external cable, because I was unable to remove the air hole grommet and wanted a completely reversible a-to-e drum kit. The external cable is essentially a female ¼-inch jack, and comes with a mounting bracket that slips between the lug screw and the head. This is connected to the internal trigger via a cable that can be fed through the air vent.
While not quite as neat as the air hole-mounted jack, this is still quite discreet and easily disguises your acoustic drums as electronic.
When you order, you’ll need to specify the length of cable you want. It’s better to go for a longer length than necessary, as you can loop the excess cable inside each drum you want to convert.
Curiously, when I ordered a batch of four triggers, the cables were included for free, which seemed to contradict the message on the product page saying they were not included. This message might in fact be referring to the fact that standard ¼-inch TRS cables are not included, rather than the internal cables.
In any case, I would suggest calling Jobeky if you can to confirm exactly what you need if you are unsure, particularly if you need to buy other accessories for your eDrum conversion such as mesh heads or rim protectors.
Installation & module set-up
Installation is very simple. Simply remove the drum head and pick a lug where you want to mount the trigger to. Usually, it is best to mount the side trigger on a lug that’s closest to the player, which means you’re very unlikely to actually hit the sensor area with your stick, avoiding the hotspot in that area.
To install:
- Loosen the screws for that lug just enough to slip the trigger through
- Position the trigger so that the top of the foam sensor area protrudes the bearing edge by 2-3mm
- Tighten the screws so the trigger is firmly in place
- If you chose an air vent-mounted TRS port, remove the metal grommet in the air vent
- Feed the TRS adaptor cable adaptor through the air vent hole and plug it into the 3.5mm jacks on the sensor.
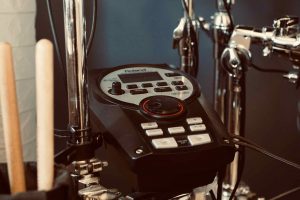
Once installed and plugged into your module, you’ll need to configure the pad settings. I can only speak for the set-up process on a Roland module, as I used the pads on my TD-11 module, but it was simple.
My recommendation is to start from a preset based on a similar pad design that uses a side-mounted trigger, namely the PDX-8. From here, you can adjust the sensitivity and rim/head gain to ensure playing dynamics are triggered reliably. There are advanced settings available too, however, I did not need this.
I also experimented with the PD-128 preset for my larger 13-inch snare and tom pads. I actually preferred this as it seemed to make the rim zone more responsive, despite the preset being based on a pad that uses a centre-mounted trigger.
My tip is to back up your pad presets using a USB stick if your kit supports this, or alternatively write down your pad settings. That way, you can experiment with different settings while being able to revert to a set-up you’re happy with if things go awry.
Buying experience
Jobeky is a small, family-run business, where the vast majority of products are made-to-order. This is important to know to help manage your expectations when it comes to things like delivery time. I had to wait a few weeks for my order to be built, and it’s likely that will still be the case several years on. This is important to remember if you’re ordering other components for your DIY drum pads, as you may well be waiting around a little for your Jobeky order to be dispatched.
My order arrived in a generic box which actually appeared to have been from a different product from a different company entirely, rather than branded packaging as you might expect from a mainstream provider. I have seen similar accounts of this for example in the review by 65 Drums. It may well be that Jobeky has polished its presentation since then, but again it’s an area that reminds you this is a small-scale business and not a huge multi-national company.
Design and build quality
The triggers themselves are solidly made, using chunky metal for the frame. All wiring is exposed, though this is no issue at all since the unit will be mounted on the inside of your drum and not seen from the outside.
What I like about the mounting bracket if your drum’s lugs use two screws, it’s sufficiently long to be able to make use of both. This helps give peace of mind that the trigger will stay absolutely straight against the mesh head.
For my snare drum, I could only mount the trigger using one screw, due to the double-ended lug design. This still worked but I was sure to tighten the screw to ensure there was no movement.
The length also means the trigger works on bass drums, where the lug screws may be further from the head.
FAQs
Performance and triggering response
I have used the Jobeky side triggers with Jobeky’s own old range of triple-ply heads (now discontinued) as well as Drum-tec real feel heads, and the triggering response has been excellent, being able to pick up the full range of dynamics.
One slight weak point for me is the rim zone when playing cross-stick on the snare. Because the rim piezo sensor is inside the trigger itself, the dynamics pick up better the closer your stick is to the sensor.
Typically, drummers will play a cross stick hit with the tip in around the 2 o’clock position, imagining the snare is a clock. But as I have the trigger positioned towards the 5-6 o’clock position, so I’m less likely to inadvertently hit the trigger hotspot, the rim response isn’t very strong.
This can be resolved in two ways: either moving the trigger and mounting it nearer to where I’ll be playing the cross-stick but avoiding hitting the head above the sensor, or changing the way I play cross-sticks. I have opted for the latter, and play cross-sticks almost horizontally across the bottom 1/3rd of the drum.
If you tend to play cross-sticks regularly, you might want to consider one of Jobeky’s centre-mounted triggers. These separate out the rim piezo, so you can mount it to the shell close to where you play cross-sticks. Alternatively, you might consider a rim-mounted bar trigger and separate out the rim zone from your snare completely.
How have the side triggers held up?
I purchased four side triggers at the start of 2017, using them for my bass drum, toms and snare drum. They have performed reliably since then, with only some minor things to note:
The first is an issue I’ve only experienced on my snare drum, which may be because it’s the most used drum on a drumkit. Over time, the internal 3.5mm plug has worked loose from the jack mounted on the trigger. This manifests in the rim zone no longer working when the jack has moved about 3mm out of the jack, which is when one of the rings on the jack no longer makes contact with where it’s supposed to be.
I have only noticed this twice in the last couple of years, which means about 4 years of regular use with no issues. It’s easy to fix, I have just removed either the top or bottom head and reseated the jack. The second time I had to do this, I noticed the jack housing was a little loose from its mounting bracket, so I tightened this as well. In future, I may need to tape the jack in place.
The second thing I have noticed very recently is that the trigger foam on my snare zone may be compressing over time due to regular use. When taking off the top head to reseat the 3.5mm jack, I noticed the top of the trigger foam was not protruding from the drum’s bearing edge, which may have slightly reduced the triggering responsiveness.
An alternative theory behind this is because I could only mount the snare trigger to one lug screw, it might have gradually shifted down over the last 6 years of use.
I don’t believe this is any different from other drums, as it’s common to see threads on eDrum forums about replacing the trigger cones on Roland drum pads.
All in all, I am happy with how the triggers have performed over the last 6 years, given their relatively low cost.
Alternatives to Jobeky side triggers
Jobeky also offers a range of centre-mounted triggers, which are worth considering if you have a module that’s capable of positional sensing. However, these are likely to suffer from hot-spotting in the same way that Roland’s own pads do. This can be avoided by not hitting the trigger cone.
Another alternative is the Triggera Intrigg internal drum trigger. This is also a side-trigger design and has the benefit of a rim piezo that can be mounted separately from the head trigger, which can improve the rim trigger response if placed in a more strategic area.
It also comes with a housing for the TRS jack which uses the vent hole. However, the unit requires an additional screw to hold it in place, so it’s less suited to drummers who want a reversible a-to-e conversion.
Finally, if you are looking for a reversible solution, then you might want to consider Roland’s own externally mounted trigger, the RT-30.
Where can I buy Jobeky drum triggers?
Jobeky drum triggers can be bought directly from Jobeky drums.
This article contains affiliate links. If you purchase a product through certain links on our site, we may earn a small affiliate commission. Learn more about our adverts and why you can trust eDrumHub here.
Roland TD-11 Review: Still good in 2023?

Roland TD-17 Electronic Drum Kit Review

The Best Roland Electronic Drum Kits