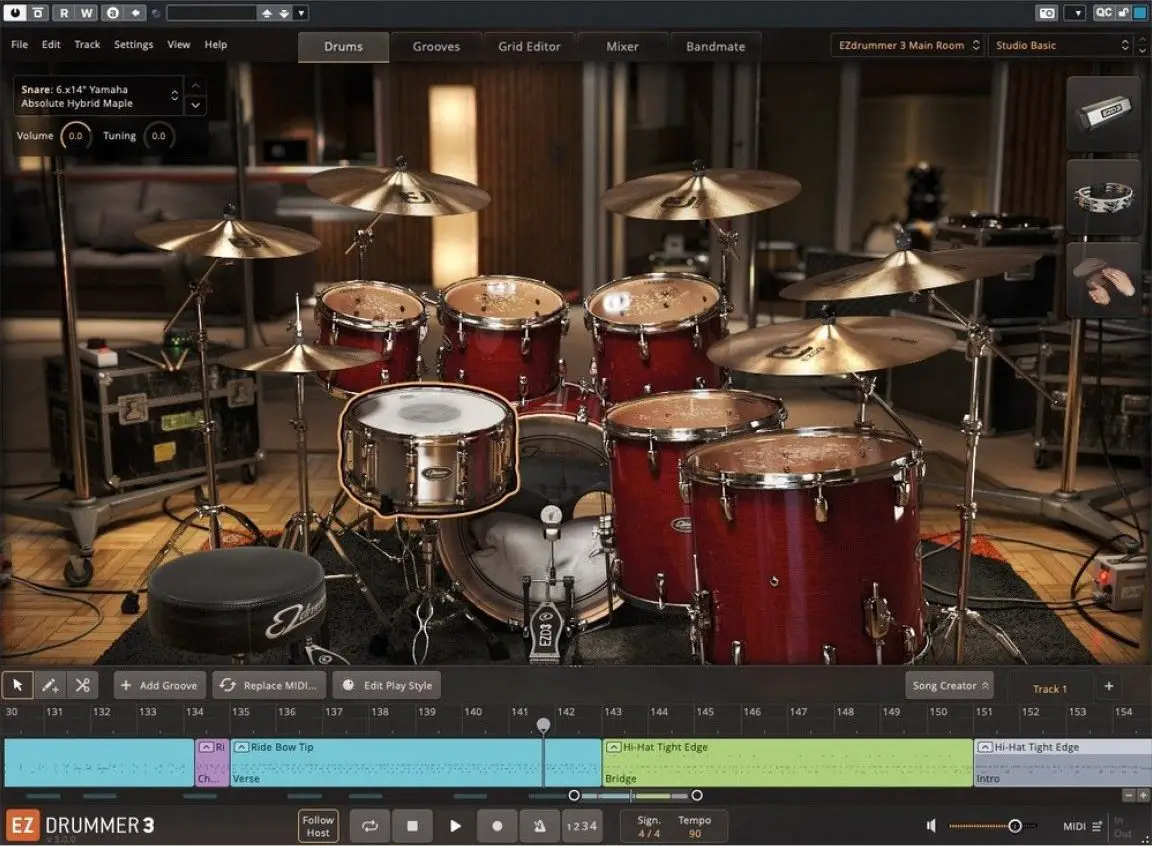
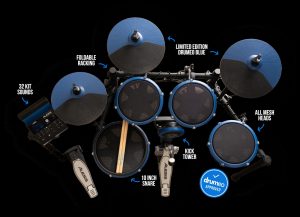
EZdrummer from Toontrack is a brilliant tool for eDrummers who want more realistic-sounding drums. In this guide, we take a look at how to use the latest version, EZdrummer 3, with your eDrums, including how to set it up with your drum pads, and where to buy.
Can you use EZdrummer with electronic drums?
Despite EZdrummer 3 mainly being marketed as a drumming production tool for songwriters, it works great triggered live by your electronic drums. But what does this mean? Simply put, you can replace your eDrum module’s sounds with the superior drum sounds of EZdrummer by plugging your drums into a computer running EZdrummer via USB or MIDI.
Read on to learn more about using EZdrummer with your electronic drums…
Related: EZdrummer 3 review
Why might you want to use EZdrummer 3 for drum triggering?
One of the main criticisms of electronic drums is that the built-in drum sounds don’t always sound great, especially on cheaper kits. In fact, even some of the best Roland drum kits can sound a bit ‘robotic’ to some eDrummers.
Many eDrummers think they need to buy a brand new electronic kit if they want better drum sounds, but there’s a better and cheaper way – hooking up your eDrums to a PC or Mac running a VST drum library, such as EZdrummer 3.
Related: Does EZdrummer 3 work on iPad?
With software like EZdrummer 3, you can replace your drum module’s built-in sounds and make your eDrums sound real. That’s because EZdrummer 3 actually uses real drum samples recorded in a professional studio, instead of synthesized drum sounds found on most eDrum modules.
With EZdrummer 3 hooked up, when you strike a drum, EZdrummer will play a sample of that drum matching the velocity at which you played the drum, all in under around 5-10 milliseconds. This allows you to play your eDrums as you do normally, only with much better, realistic-sounding drums.
Of course, other VST drum libraries are available, notably Superior Drummer 3, which is a scaled-up, pro-level version of EZdrummer 3, from the same developer. Learn more about using Superior Drummer 3 with eDrums, or find out about the differences between EZdrummer 3 and Superior Drummer 3.
Which electronic drum kits work with EZdrummer 3?
EZdrummer 3 includes MIDI mapping presets for almost all the popular electronic drum brands, and regularly updates the presets when new eDrum kits and modules are released. Some of the supported brands include:
- Alesis
- ATV
- EFNOTE
- GEWA
- KAT
- Millenium
- Pearl
- Roland
- Simmons
- Roland
- Yamaha
Do you need a DAW to use EZdrummer 3?
You can use EZdrummer 3 in a DAW (Digital Audio Workstation) or as a standalone application. The features are the same no matter which option you choose.
If you are using EZdrummer with your eDrums and simply want to use it to replace your module sounds, you may want to use it in standalone mode. This means you don’t need to invest in any other software to get up and running. And because you’re only running one application instead of two, you don’t need as many system resources on your computer. This can mean better battery life if you’re using a laptop, or even the ability to use an older computer that meets the minimum EZdrummer 3 requirements.
The standalone mode also works well if you want to record simple drum covers by following our simple drum cover recording guide.
If you want to use EZdrummer 3 to record your drumming performances, then you’ll likely want to use a DAW. This allows for multitrack recording of your drums and other instruments, and mixing and mastering your tracks.
DAWs supported by EZdrummer 3 include:
| Software package | Minimum supported version |
| Ableton Live | 10 |
| Cakewalk | 2018 |
| Cubase | 6 |
| Digital Performer | 10 |
| GarageBand | 10 |
| Logic Pro | 9 |
| Pro Tools | 12 |
| REAPER | 6 |
| Studio One Artist | 5 |
| Studio One Professional | 2 |
| WaveForm | 10 |
EZdrummer 3 may also work with other DAW software not listed above, which have been tested for compatibility by Toontrack. In general, any DAW host needs to support VST3, AU or AAX instruments.
How to set up your eDrums with EZdrummer 3
Setting up EZdrummer with your electronic drums is simple:
Install EZdrummer 3
This is done via the Toontrack Product Manager. Be sure to install both the EZdrummer 3 application and the Core Library (which contains all the drum sounds). You can even install the Core Library on a separate drive if you don’t have space on your main drive.
Connect your drums to your computer
The best way to connect your eDrums to your computer is via USB, if your module has a USB interface. Remember to download and install any drivers from your eDrum manufacturer’s website first.
If your kit only has a MIDI interface, which is common on eDrums older than around 10 years, then you’ll need to buy a MIDI to USB interface or USB audio and MIDI interface. I would recommend using the latter, which can help avoid audio latency issues detailed in the troubleshooting section below.
Turn off your drum’s module sounds
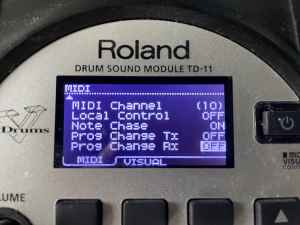
Now, turn off your module’s built-in sounds to avoid both EZdrummer 3 and your drum module generating sound. This is especially important if you’re using your module’s USB interface and are routing audio back to your module’s headphones or master out.
Different eDrum manufacturers can have different names for this functionality. On Roland modules, it’s called ‘Local Control’, and is usually found under the MIDI settings in the module’s on-screen interface.
Select the audio device within EZdrummer
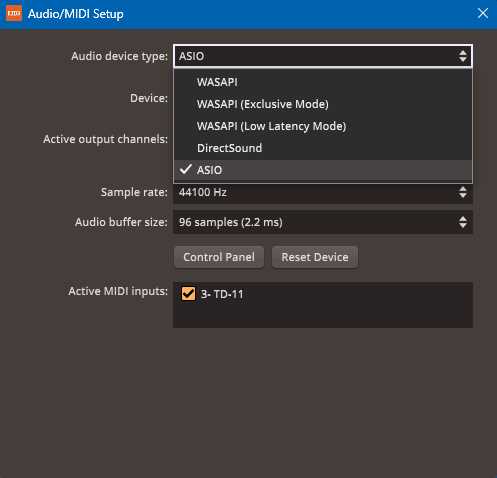
Click on Settings, then Audio/MIDI Setup. Here you can assign the MIDI from your drums as the source for triggering EZdrummer 3, as well as choosing the audio output you want to use.
If you’re using a PC, you’ll get the best results if you choose ASIO under the Audio Device Type menu. This is a low-latency audio driver – after assigning, you’ll notice the latency in milliseconds under audio buffer size will decrease when enabled. You can also adjust the audio buffer size here, but be careful, if it’s too low, you may experience audio issues depending on your hardware.
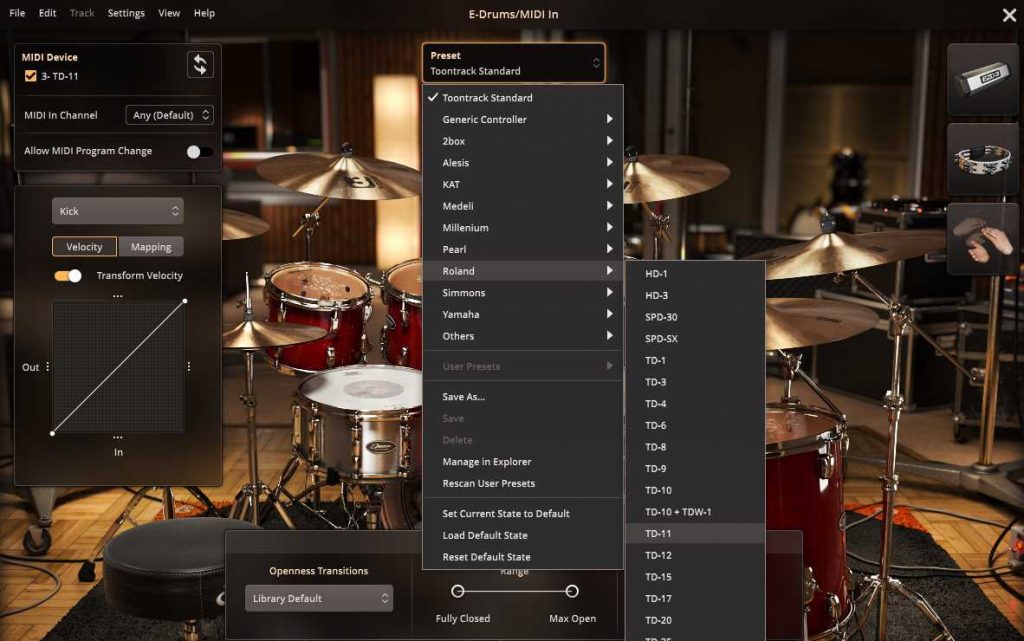
Choose your eDrums PresetGo to the E-Drums/MIDI In menu and select your eDrum kit from the menu. You can then reassign pads as required and save these as a custom preset by clicking Save As on this menu. We’ll go into more detail on this below.
Troubleshooting
If you find that there is a delay between striking your drums and sound being generated, the issue may be to do with the audio buffer size. Open the driver software for your drum module and look for a control to edit the Audio Buffer Size. You’ll want to set the buffer size as small as possible without other audio artefacts or glitches occurring.
Sometimes Windows users will have issues if they use their built-in computer audio for sound output (for example, using a MIDI to USB interface for the drums, but using the computer’s headphone output). This can often be solved by using the free ASIO4ALL software, which is a low-latency audio driver that improves audio playback performance.
If you have a Mac, then you’ll likely experience fewer issues relating to latency compared to Windows. This is due to the way MacOS is designed, which makes low-latency audio a priority.
How to assign drum pads on EZdrummer 3
Assigning your eDrum pads to sounds in EZdrummer is a bit different to a typical drum module. Drum modules usually treat each drum or cymbal as individual instruments that can be assigned to any pad that you wish. Meanwhile, the best way to think about EZdrummer is that it samples a specific drum kit that has been meticulously captured in a recording studio.
What does this mean in practice? Essentially, each drum kit has a number of slots to which you can assign your physical eDrums and eCymbals to. However, each slot only has a limited number of instruments. Take the kit in the screenshot below, for example. There is only one china cymbal available in this slot, and you cannot assign a different instrument to this slot.
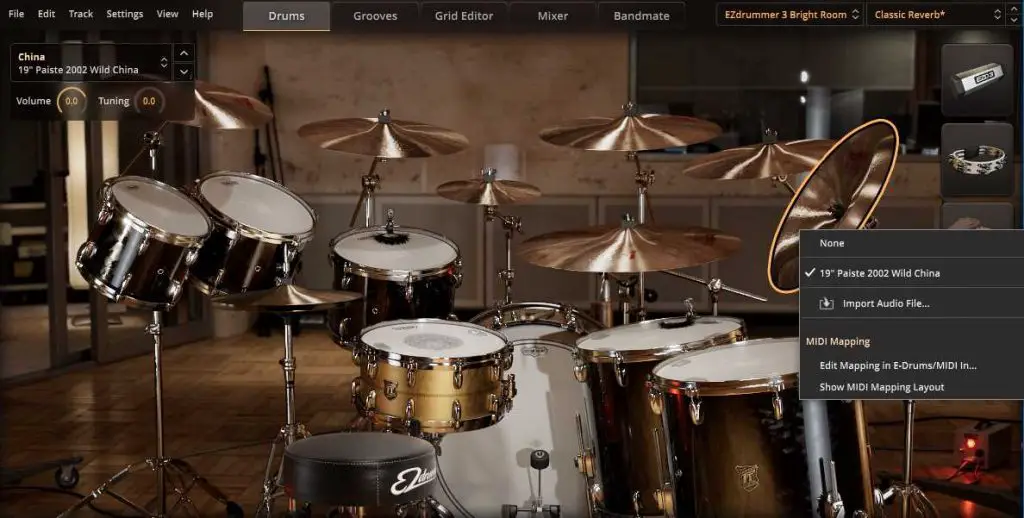
Instead, if you had a cymbal pad assigned to that slot and you wanted to change it to a crash sound, you’d need to go into the MIDI mapping settings, and remap that eCymbal to a different slot in EZdrummer 3.
Similarly, each of the three libraries in the EZdrummer 3 library has a different number of instrument slots and requires slightly different MIDI mapping. Here’s the Tight Room kit:
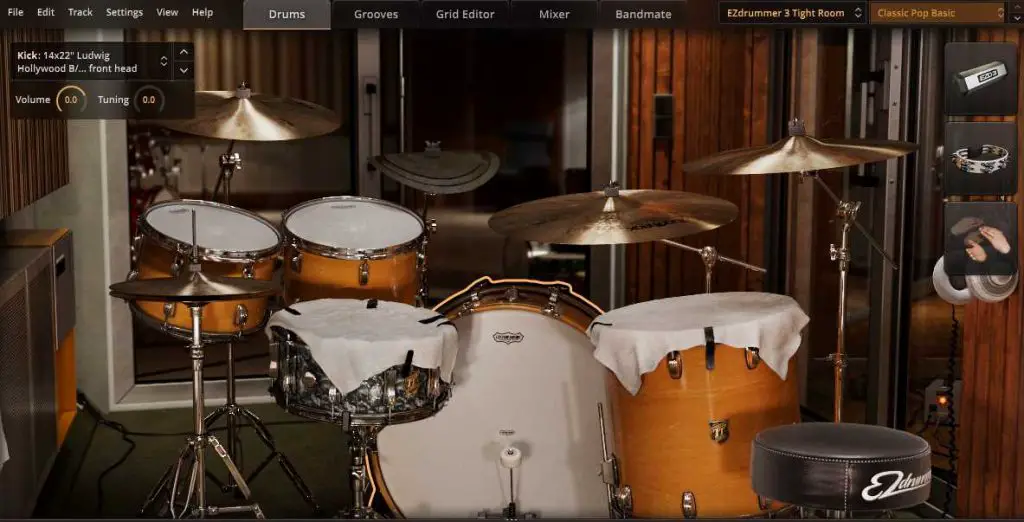
This kit has fewer drums and cymbals than the other libraries. So what happens if you have more drums and cymbals than this, could you assign your extra pads to sounds from other kits? Unfortunately not, in EZdrummer 3, you are limited to the slots available on each kit. This limitation does not exist on Superior Drummer 3, though again, it has some limitations.
A good way to think about it is that you should try and assign the pads on your kit to match an approximation of the on-screen kit in EZdrummer 3. For each kit in the EZdrummer 3 library, you can follow these steps:
- Open one of the three drum kits
- Open the E-Drums/MIDI In settings and choose the preset for your drum module
- Remap any drums and cymbals to suit your preferences
- Turn off any drums and cymbals in the EZdrummer 3 interface that you don’t need
- Go back to E-Drums/MIDI In and click Save As to save your custom MIDI preset
- Go to File > Save As to save what you have done as a project
- Repeat for any other EZdrummer 3 drum kits you want to use
After completing these steps, you’ll have separate MIDI mapping settings for each drum kit configuration you want to use in EZdrummer 3. Instead of launching EZdrummer 3 from a blank project, you can simply open these project files and all your settings will load with no need to configure anything in the menus.
FAQs
How can I get EZdrummer 3?
While it’s possible to buy EZdrummer 3 directly from Toontrack, sometimes you can find better deals from other resellers. Check out some of the retailers below:
If you’re not sure if EZdrummer 3 is for you, Toontrack offers a free 10-day trial. Find out how to claim it here.
This article contains affiliate links. If you purchase a product through certain links on our site, we may earn a small affiliate commission. Learn more about our adverts and why you can trust eDrumHub here.
